Published 1st April 2021
 

The Ultimate Guide to Spring Cleaning

​​​​​​​Safety first! In all instances, before you begin cleaning it, ensure your appliance is unplugged from the mains; moreover, that these elements do not get wet in the process.

​​​​​​​ Our manufacturers build their appliances to last; this is why so many of them offer guarantees of up to 5 years when you purchase a new appliance. However, with a dedicated effort to conduct a little maintenance on them, you can prolong the lifespan of your product even further, keeping it running efficiently, and saving you money.
​​​​​​​
​​​​​​​In all instances, we recommend referring to the manufacturer’s guidelines before spring cleaning any of your home appliances.
​​​​

How to Spring Clean your Small Appliances

Anything that is mechanical or electrical requires maintenance, so make sure you don’t neglect your small appliances in your big Spring clean! Plus, you’ll be rewarded with a more energy efficient product that lasts longer too. ​​​​​​

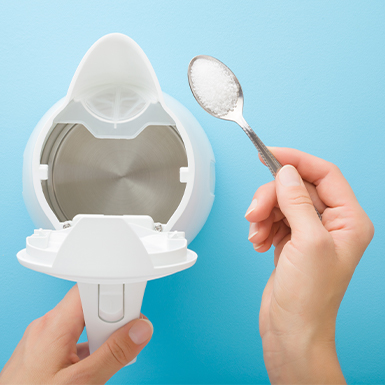
How to Clean a Kettle

​​​​​​​Whether it’s a jug or a traditional style kettle, the process is the same - every few months use white vinegar, baking soda, lemons, Coca-Cola, or a descaling kit from your local hardware store. All you need to do is choose your preferred cleaning product and get to work!​​​​​​
​​​​​​​
  • Using white vinegar? Using a 50/50 mix of water and vinegar, fill your kettle to ¾ capacity and boil. Leave the solution to stand for approximately 30 minutes and then pour away. Finally fill your kettle with fresh water to capacity once or twice, and boil to get rid of any lingering vinegar tastes. 
  • Using baking soda? Add a tablespoon of it to a full kettle and boil. Leave to stand for up to 30 minutes and then pour away. Boil once or twice with fresh water to get rid of any bicarb tastes. If your kettle is particularly coated in limescale. you can try making a paste with 125g of baking soda and a few drops of water. Using a clean toothbrush administer the paste to the inside of your kettle, scrubbing to get deep into the limescale. Rinse well and ensure you boil your kettle with fresh water once or twice to get rid of any lingering taste of bicarb! 
  • Using lemons? Use half a pint (500ml) of water and 30ml of lemon juice in your kettle and leave to stand for one hour before bringing the solution to the boil. Pour away when done and rinse well before resuming its usual operations. 
  • Using Coca-Cola? Amazingly this product has more uses than just as a sweet treat and sugar rush. This world famous drink has a phosphoric acidity at a pH level of 2.8, making it as effective as white vinegar or lemon juice for some cleaning tasks! Fill your kettle with cola and boil, leave it to cool down for 30-60 minutes then pour away. Thoroughly rinse your kettle, then boil with fresh water once or twice and you’re ready to make your perfect brew again.       
  • Using a descaling kit? Just follow the instructions on the packet and you’re done. ​​​​​​​
And the tea cosy on top? Once you’ve completed the descaling of your kettle, all that’s left is a final wipe down of the exterior! If you have a model with a stainless steel exterior, dip a soft cloth in olive oil and use a gentle circular rubbing motion to buff until shining! Plastic kettles can be wiped over with a cloth dipped in warm, soapy water. 
​​​​​​​
  • ​​​​​​​Are you looking for a new kettle for your kitchen? Shop models from your favourite manufacturers, like Bosch, Beko and Smeg online for distribution via our network of independent Euronics Agents. 

Cleaning Your Toaster

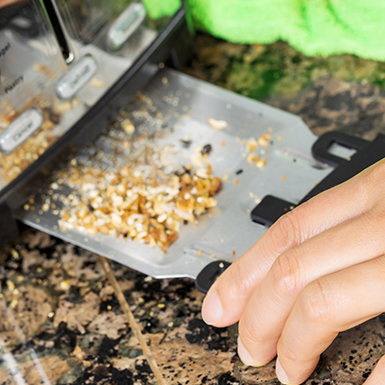
 To keep this handy kitchen appliance working efficiently and free from weeks of stale toast crumbs, experts recommend that you give your product a deep clean every 3-4 weeks, however, if you have a large family who loves to toast, every 1-2 weeks is best. 
 
​​​​​​​We’ve written this handy guide to keep your toaster in tip top condition! ​​​​​​
​​​​​​​
  1.  ​​​​​​​Cleaning the inside. Ensure your appliance is unplugged from the mains and has cooled down from the mornings toast fest! Place a large tray on the side and turn your toaster upside down, gently shaking all the crumbs out, remove the crumb tray and shake it off. Pop it into a sink with warm soapy water. In the meantime, using a large, flat clean paintbrush or a pastry brush, start from the top and work your way down, gently brushing away any remaining crumbs. Wash up your crumb tray, ensure its fully dry and replace. 
  2. Who loves cheese toasties? If cheese has melted onto your toaster, wait until your appliance has cooled down and unplug it from the mains. Once it's set, remove gently with a plastic spatula or wooden spoon, you can use an old toothbrush to gently remove any residue on the bars. 
  3. Cleaning the outside. For mildly dirty toasters, a cloth dipped in warm soapy water should do the trick. However, for sticky finger marks and brown staining you’ll need to break out the trusty baking soda! First start with a good wipe all over with warm, soapy water, then for any stubborn stains, simply dip an old toothbrush in baking soda and gently scrub the stains until gone. Wipe down with a clean cloth, and finish by buffing up with a microfibre cloth. Don’t forget the controls, these might need a little attention too. 
  4. Chrome Toaster? For chrome toasters, white vinegar is perfect for removing stains, grease and sticky finger marks. Using a 50/50 mix of water and white vinegar and a cloth, wipe down the entire toaster paying special attention to any stains. Allow the solution to sit for a few minutes before wiping down with a fresh cloth, finishing by polishing with a microfibre cloth. 
  5. New Toaster? We’d always advise you to give your new product a clean before putting any food in it. Simply use a cloth dipped in warm soapy water to give it a wipe down, then turn upside down and gently shake out any debris. Use a clean paint or pastry brush to sweep out the interior and finish with a polish up with your microfibre cloth.      ​​​​
Did you know? This underrated superstar of the kitchen can do so much more than toast! With the aid of a toaster bag you can make ​​​​​​​potato waffles, tortilla chips, and even cook sweet potatoes in your toaster. Hey, we’ll toaster that!  
​​​​​​​
  • Looking for a new toaster for your kitchen? Shop models from your favourite manufacturers online for distribution via our network of independent Euronics Agents. 

Cleaning Blenders, Food Processors, Juicers & Smoothie Makers​​​​​​

These handy kitchen appliances have enjoyed a resurgence of late, with the increasing popularity of healthy fruit and vegetable smoothies and juices. Plus, they are ever so handy to ensure food doesn’t get wasted as you can easily transform leftovers into delicious soups, and overripe fruit into juices and smoothies. 

For those of us who are familiar with them, you’ll know these devices are susceptible to gathering food residue. Whilst the majority of components can be placed into the dishwasher, this can be fiddly and time consuming. ​​​​​​​Follow our handy guide to have your product sparkling clean and free from fruit pith and soup smears! 
​​​​​​​
  1. ​​​​​​​Ensure your blender is free from food residue by rinsing out thoroughly, then fill half full with hot (not boiling) water.
  2. Add a few drops of dishwasher liquid. Experts recommend dishwasher liquid, rather than washing up liquid as it is more effective. 
  3. Power her up! Pop the blender back on its base, making sure it's securely in place, then run for 30-45 seconds.   
  4. Remove the blender and empty the liquid away. 
  5. Rinse & repeat! Thoroughly wash out the blender under running warm water, ensuring all frothy remnants have been swilled out. Rinse again with cold, place upturned on your drainer and leave to dry. ​​​​​​​​​​​​​​​​​​​
​​​​​​​Q​​​​​uick References
  • Need a new Blender for your kitchen? We think you’ll love these great products from Ninja, they’re getting top scores from our customers.
  • Food Processors? These stylish appliances are perfectly sized to sit on your kitchen countertops and make sauces and purées a breeze! Shop online for delivery via our network of local, independent store owners.  
  • Juicer & Smoothie Maker? Coming complete with a one year guarantee, this kitchen Ninja allows you to make nutritious juices and smoothies, with “minimal effort with maximum results”. (Verified Reevoo review: Rebekah, Belfast - 11.02.21).

Cleaning Air Fryers

Famous for its French fries, tender chicken and other crunchy snacks without the need for copious amounts of oil and better still, you don’t have to be a kitchen pro to use it! A dirty air fryer will build up grease, causing your fryer to start smoking and ruining the flavour of your recipes. So, just like any other kitchen appliance, this trusty device requires regular cleaning and maintenance to keep it working efficiently and ensure that it is free from smells and odours. 

Follow our handy to deep clean your air fryer:​​​​​​
​​​​​​​
  1. Safety first. Ensure your device is unplugged from the mains.
  2. Clean the basket and pan. Some models’ detachable parts are dishwasher safe, (refer to your manufacturer’s instructions to check yours is safe), if it is simply pop it in the dishwasher. If not, simply pop the basket and pan into hot soapy water and wash up with a sponge. If food has become stuck, just leave to soak for 10 minutes before getting to work. Pop it on the drainer and leave to dry. 
  3. Cleaning the interior. Using a soft cloth or non-abrasive sponge wipe down the interior, paying special attention to the heating element. If grease is present add a small amount of washing liquid to your cloth or sponge and wipe clean. If needed you can use a soft bristled brush to help remove any stuck on dirt. When all grease is removed, wipe over again with a cloth dipped in hot water and leave to air out and dry fully.
  4. Cleaning the exterior. Using a cloth moistened in hot soapy water, simply wipe clean the exterior of your air fryer. If the exterior is stainless steel, you may want to use special stainless steel wipes. Never submerge your air fryer in water!
  5. Maintaining. Manufacturers recommend cleaning this product fully after every use, to keep it free from odours of recipes from previous uses. Alongside, make sure you do not overfill your air fryer! When too full, the food doesn’t cook properly, and more grease and food particles can get stuck to the heating element. ​​​​​​​
​​​​​​​Our customers are loving the Ninja range of products, and we can see why! View the range of air fryers and dehydrators here

Steam Irons

​​​​​​​Let’s face it, we all like to look our best and nothing looks smarter than a crisply pressed shirt or blouse. However, just because this isn’t the most expensive kitchen and home appliance one can own, it seems to get replaced more rapidly, when really all it needs is a little TLC and some descaling.
​​​​​​​
​​​​​​​Whilst manufacturers advise descaling your iron every 1-4 months dependent on use, Caroline Bloor, Consumer Affairs Director for Good Housekeeping, advises your iron will give the following tell-tale signs that it’s in need of descaling:
​​​​​​​
  • Chalky residue deposited on your clothes when you hit the steam button. 
  • Too hot! Is there a sticky residue on the soleplate? From ironing fabrics on a setting that is too hot. 
  • Dragging? If it feels like your iron drags rather than glides. 
  • Marks & stains. 
​​​​​​​None of us wish to start the entire washing cycle again, or indeed ruin the crisp white shirt you were planning on wearing! Just follow our easy step-by-step guide to have your ironing gliding like Anna Pavlova across your clothes again!
​​​​​​​
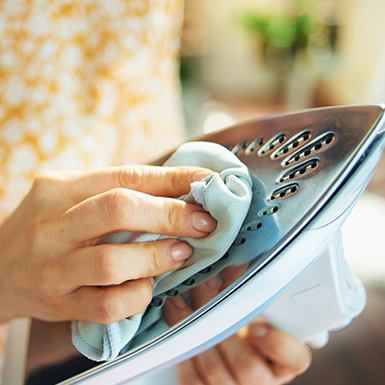
  1. ​​​​​​​​​​​​​​Cleaning the soleplate. First and foremost, never use abrasive cleaners on your iron’s soleplate. Specialist cleaning products can be bought; however you can achieve the same results with some more common household products! Start by using a large, clean, damp cloth and wipe over. If this fails to remove residue, you can use ordinary white toothpaste and gently apply with a damp cloth until the residue is gone. Or, turning the iron to a low setting, set a tumble dryer sheet down and iron over it, replace when needed, and keep ironing until the residue is gone.  ​​​​​​​
  2. Deep cleaning. These days the majority of irons produced have some form of self-cleaning system. Following manufacturer’s instructions, use these regularly and as advised. If not, don’t worry, using white vinegar we can achieve the same result (please ensure first you check those manufacturer guidelines!) Using a 50/50 mix of vinegar and water, fill the water reservoir until it is ⅓ full. Turn your iron onto a medium heat and let it steam for 5-10 minutes until all of the vinegar solution has evaporated. Next, refill with fresh water and turn onto steam again. When complete wipe clean and you’re done!  
  3. Clogged vents. If the vents on the soleplate have become clogged with limescale, you can use a 50/50 mix of white vinegar and water and apply to the holes. You may have to wrap some cotton wool around a cocktail stick to properly administer this. Alternatively, you can purchase descaling kits off the shelf. Just follow the instructions on the packet. ​​​​​​​​​​
​​With your iron now Spring cleaned to perform as efficiently as ever, you’ll be gliding through that laundry pile in no time. 
Shop for irons from your favourite manufacturers here, alternatively find your local Euronics UK store and ask them for expert advice. 
Keep an eye out tomorrow for tips on how to clean your TV & Entertainment systems. Available here or via our social channels (Facebook, Twitter or Instagram).​​​​​​